
AWS
Setting up AWS integration in Ploy in order to manage users and access to critical services provided by Amazon Web Services (AWS).
Intended purpose of this document is to setup an AWS integration in Ploy. This guide will require you to be able to create IAM Roles for your AWS account so before you continue make sure you have proper access to the console.
We have provided a set of permissions that are a sensible start for Ploy to have, but make sure to check the implications before you apply them. As we do not modify the roles on AWS, future changes will have to be done by you.
Getting started
Navigate to your organisations integrations page and click "Setup" under the Amazon Web Services integration to get started.
This will open a multi step integration wizard asking you for crucial details about your AWS account:
Your AWS Account ID (which you can locate on the console)
Your AWS Region (if you have multiple regions please set up multiple integrations)
Please note down the External ID as this is the secret we will use when communication with your AWS account.
Setting up an IAM role
The next step of the configuration is adding a role that Ploy is going to use when interacting with your AWS account.
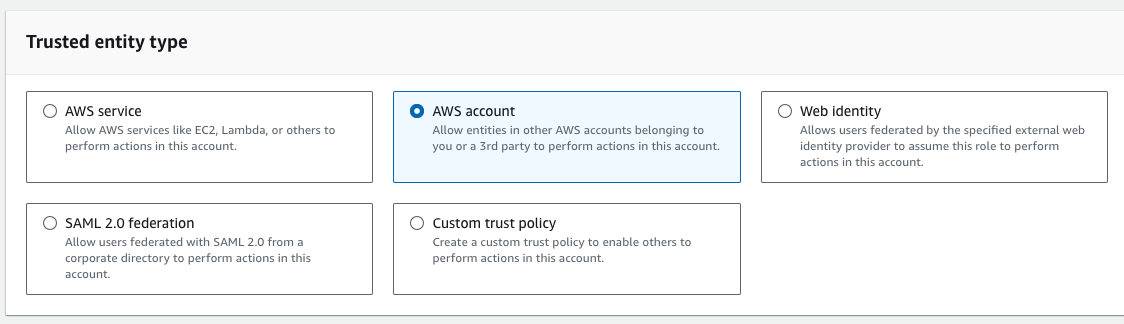
Please click on the "Open AWS Console" button or here. On the AWS console make sure that Trusted entity type selected is AWS account.
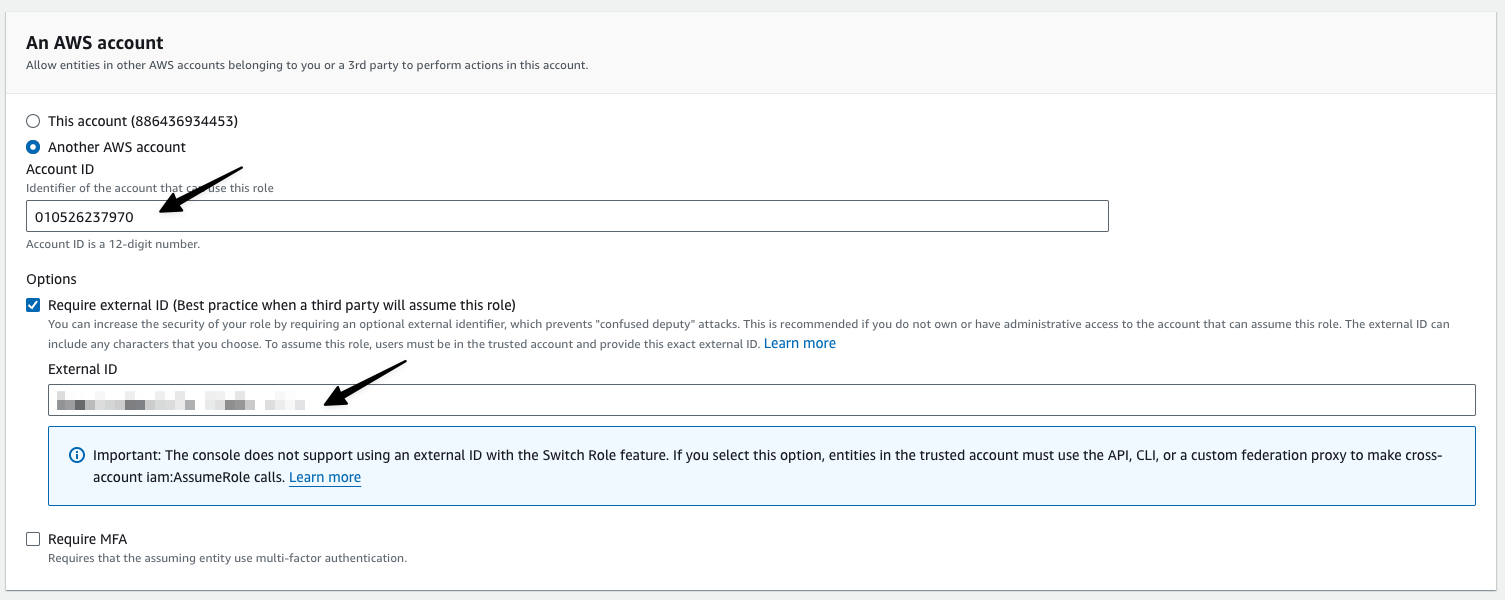
And in the next part of the wizard make sure to enter Ploys account AWS ID: 010526237970.
Select the Require external ID option and enter the ID from the previous step.
Selecting permissions
Ploy will require a couple of permissions from you:
{
    "Version": "2012-10-17",
    "Statement": [
        {
            "Effect": "Allow",
            "Action": [
                "s3:ListAllMyBuckets"
            ],
            "Resource": "*"
        },
        {
            "Effect": "Allow",
            "Action": [
                "dynamodb:ListTables"
            ],
            "Resource": "*"
        },
        {
            "Effect": "Allow",
            "Action": [
                "sqs:ListQueues"
            ],
            "Resource": "*"
        },
        {
            "Effect": "Allow",
            "Action": [
                "lambda:ListFunctions"
            ],
            "Resource": "*"
        },
        {
            "Effect": "Allow",
            "Action": [
                "iam:GetAccountAuthorizationDetails",
                "iam:ListRoles",
                "iam:ListUsers",
                "iam:ListPolicies",
                "iam:ListGroups"
            ],
            "Resource": "*"
        },
        {
            "Effect": "Allow",
            "Action": [
                "sso:ListInstances"
            ],
            "Resource": "*"
        },
        {
            "Effect": "Allow",
            "Action": [
                "identitystore:ListUsers",
                "identitystore:ListGroups",
                "identitystore:ListGroupMemberships",
                "identitystore:DescribeUser",
                "identitystore:CreateGroupMembership",
                "identitystore:GetGroupMembershipId",
                "identitystore:DeleteGroupMembership"
            ],
            "Resource": "*"
        },
        {
            "Effect": "Allow",
            "Action": [
                "sso:ListAccountAssignmentsForPrincipal",
                "sso:ListPermissionSets",
                "sso:DescribePermissionSet",
                "sso:ListCustomerManagedPolicyReferencesInPermissionSet",
                "sso:ListManagedPoliciesInPermissionSet"
            ],
            "Resource": "*"
        },
        {
            "Effect": "Allow",
            "Action": [
                "rds:DescribeDBInstances",
                "rds:ListTagsForResource"
            ],
            "Resource": "*"
        },
        {
            "Effect": "Allow",
            "Action": [
                "ec2:DescribeInstances",
                "ec2:DescribeTags"
            ],
            "Resource": "*"
        },
        {
            "Effect": "Allow",
            "Action": [
                "ecs:DescribeClusters",
                "ecs:ListTagsForResource",
                "ecs:ListClusters"
            ],
            "Resource": "*"
        }
    ]
}
Once you're done with selecting permissions on the next step. Name the role how ever you want, I chose: "PloyJITAccess".
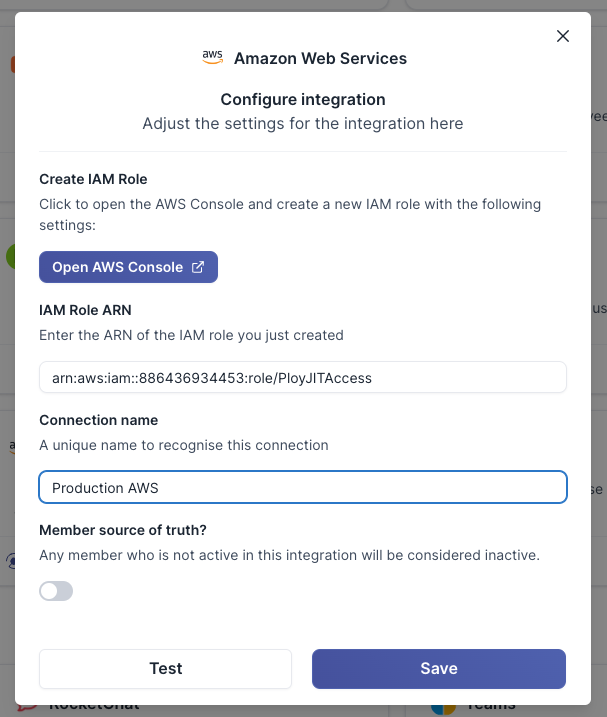
After, open the same role you just created and copy it's IAM Role, e.g. arn:aws:iam::886436934453:role/PloyJITAccess.
That's it
Once the initial scan is completed you will see your Identity Center users and groups, along with all IAM Roles and IAM Users available in the region you configured the integration.