
You have not consented the permissions yet, or consent is still propagating. Go to API permissions in your app registration, click Grant admin consent for <tenant>, wait a few minutes, and retry.
Connect Microsoft with your own app registration
Connect Ploy to Microsoft by creating your own app registration in Microsoft Entra. This gives you full control over exactly which permissions Ploy receives, and Ploy authenticates using short-lived, cryptographically signed tokens via workload identity federation—no client secret is ever shared.
Which mode should you choose?
Ploy supports two ways to connect to Microsoft:
Mode | Best for |
|---|---|
Ploy managed app | Quick setup with a single admin consent. See the Ploy managed app setup guide. |
Your own app registration | Full control over the access you grant Ploy. You create the app, pick the capabilities, and manage the federation yourself. |
This guide covers the Your own app registration flow.
Before you start
An Entra admin who can create app registrations, grant admin consent, and assign directory roles.
Step 1: Choose your connection mode
In Ploy, go to the Microsoft integration setup and choose Your own app registration on the How should Ploy connect to Microsoft? screen, then continue.
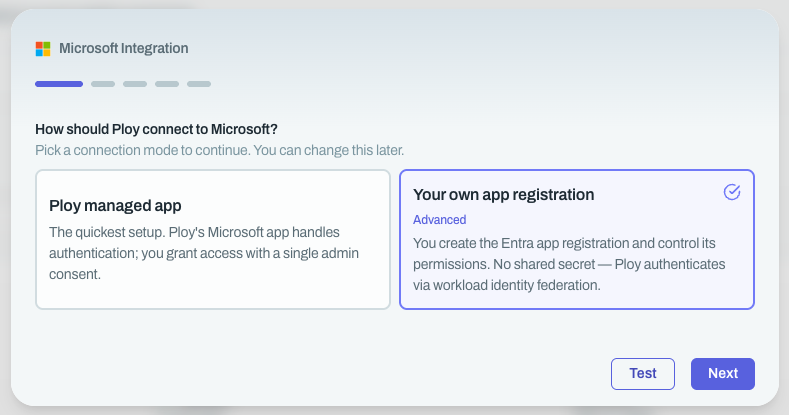
Connection mode selection in Ploy
Step 2: Select capabilities
On the Select the capabilities to grant Ploy screen, choose which capabilities Ploy should have. Core identity read access is always required. Every other capability is optional—choosing fewer capabilities means fewer permissions granted to your app.
The available capabilities are:
Core identities
Directory — Read
Domains — Read
Users — Read
Organization — Read
Account lifecycle
Manage user accounts — Read/Write
Groups & membership
Groups — Read
Manage group membership — Read/Write
MFA & auth methods
Auth methods — Read
Manage auth methods — Read/Write
Access packages
Access packages — Read
Manage access packages — Read/Write
Apps & OAuth consent
Apps & grants — Read
Manage OAuth grants — Read/Write
Devices
Devices — Read
Manage devices — Read/Write
Mail & calendar
Mail & calendar — Read
Manage calendars — Read/Write
Sign-in activity & usage
Sign-in & usage reports — Read
AI agent usage
Copilot interaction usage — Read
Directory roles
Directory role assignments — Read
Conditional access
Conditional access policies — Read
SharePoint
SharePoint sites — Read
Custom security attributes
Custom security attributes — Read
Use Enable all if you want to select every optional capability at once. When you are finished, continue to the next step.
Step 3: Create the app registration and paste the permissions manifest
In the Microsoft Entra admin center, go to App registrations and click New registration.
Keep Supported account types set to Accounts in this organizational directory only (single tenant).
Register the app, then open its Manifest.
Find the
requiredResourceAccessproperty. A new app has a defaultUser.Readentry there—replace the entire value with the JSON array that Ploy provides on this step, then click Save.
Each id in that JSON is a Microsoft Graph application permission. You'll be able to review the permissions in the next step before granting admin consent.
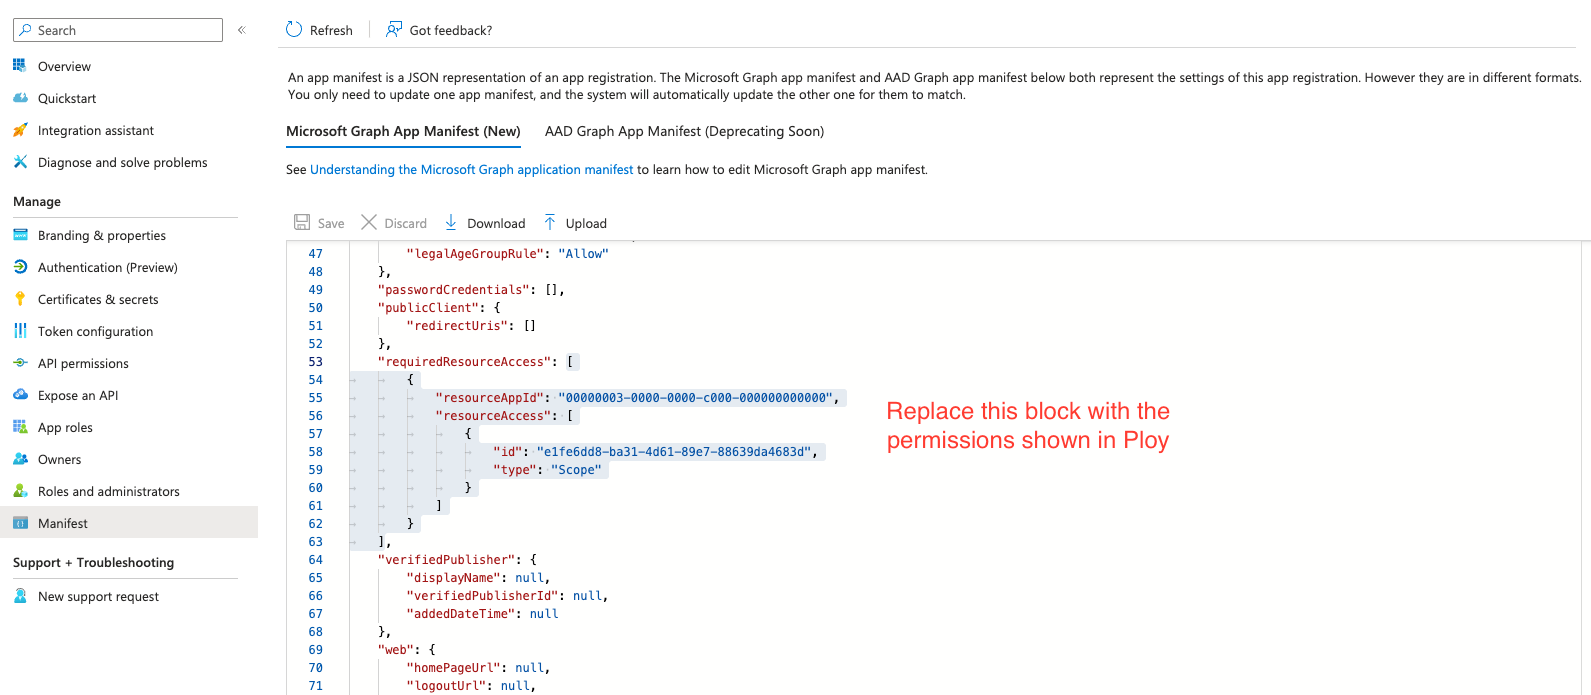
Ploy provides the exact JSON array to paste into your app registration manifest
Step 4: Grant admin consent
The manifest requests permissions but does not grant them. In your app registration:
Go to API permissions.
Click Grant admin consent for <tenant>.
Wait for the permissions to show a green Granted status.
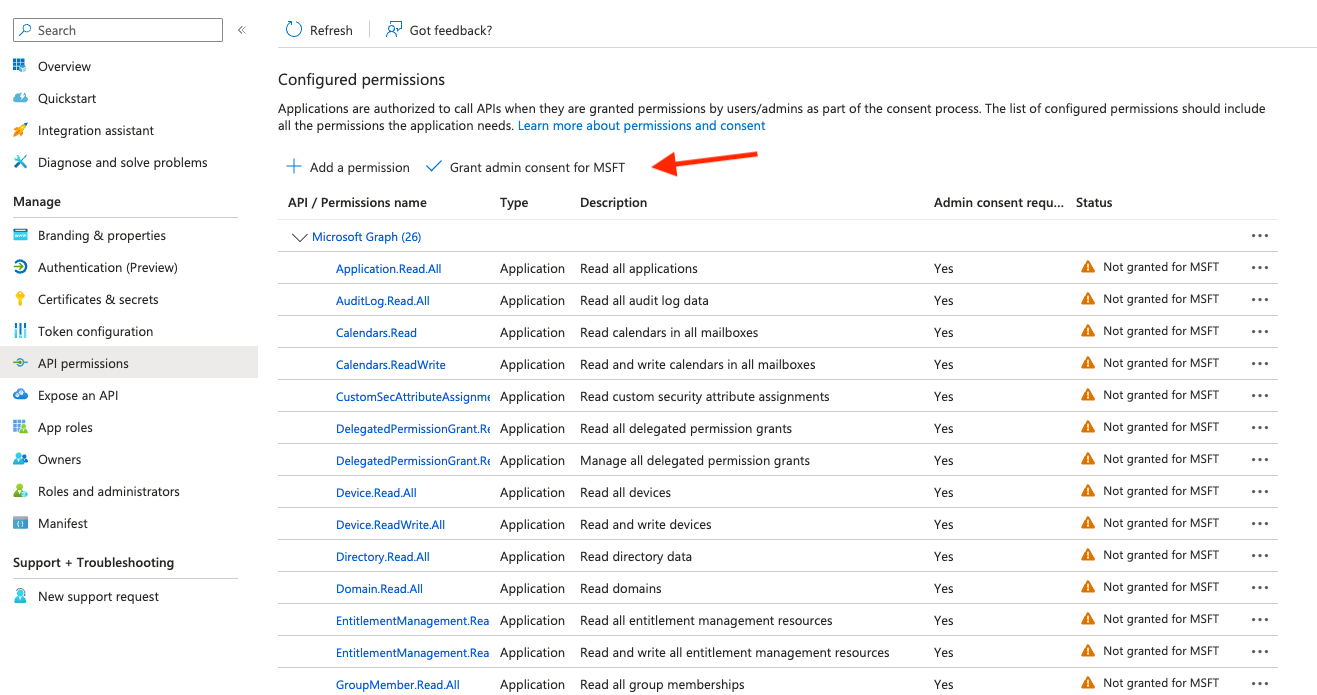
API permissions page where admin consent is granted
Admin consent can take a few minutes to propagate through Microsoft. If a later step fails, wait a couple of minutes and retry.
Step 5: Assign a directory role for reset actions (conditional)
If you selected Manage user accounts or Manage auth methods, the app needs a Microsoft Entra directory role in addition to its API permissions. App permissions alone cannot reset passwords or authentication methods.
In the Entra admin center, go to Roles and administrators.
Search for Authentication Administrator and open it.
Click Add assignments, search for your app registration by name, and assign the role to its service principal.
To reset admin accounts too, use Privileged Authentication Administrator instead.
Step 6: Add a federated credential
Still in your app registration:
Go to Certificates & secrets → Federated credentials.
Click Add credential and choose Other issuer as the scenario.
Paste the Issuer and the Subject identifier that Ploy displays on this step.
Leave the Audience as its pre-filled default.
Save the credential.
This lets Ploy authenticate with a signed token instead of a shared secret.
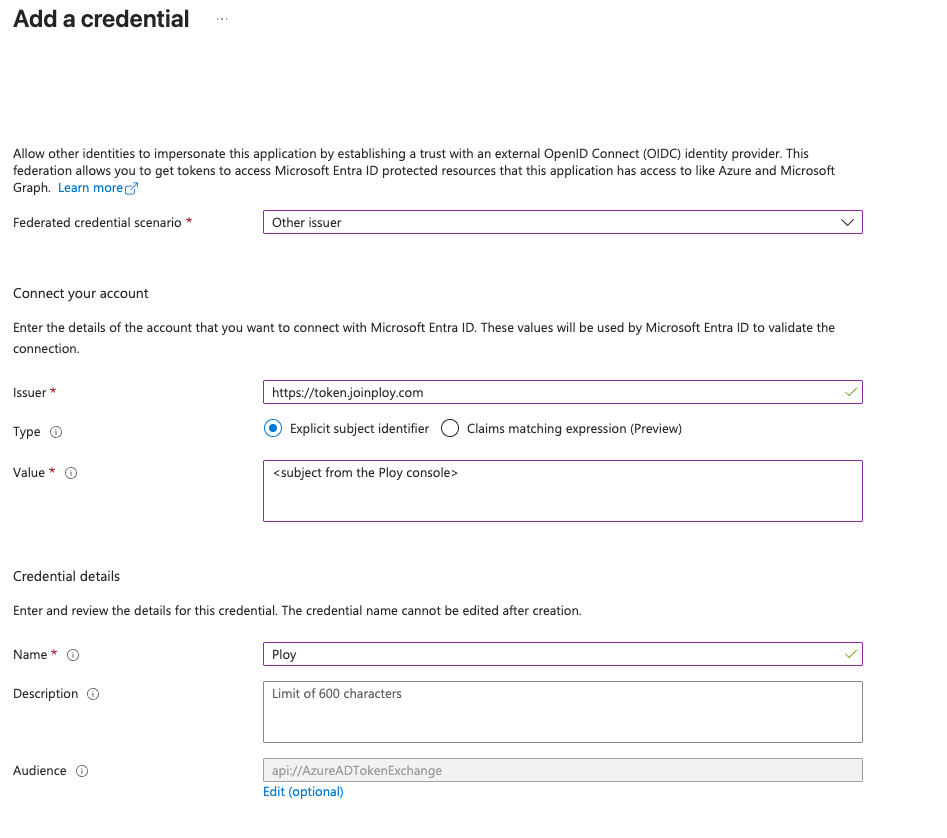
Federated credential form in Entra with the issuer and subject identifier pasted in
Step 7: Enter the client ID and tenant domain, then test
From your app registration’s Overview page, copy the Application (client) ID and paste it into Ploy.
Enter your tenant domain, for example
yourcompany.onmicrosoft.comor a custom domain.Click Test connection. On success, the integration is connected.
Troubleshooting
Grant admin consent error on test
Your federated credential is still propagating
Microsoft Entra can take a minute or two to register a new federated credential. Wait briefly and retry.
What’s next
After connecting, you can configure additional Microsoft features like Microsoft Exchange or Teams notifications.
Was this helpful?